
Choosing a new tooth colour is one of the most thrilling parts of getting a new smile. While the napkin-white teeth pumped on social media are the primary contributor to confusion, overthinking or making a decision too quickly may result in errors as well.
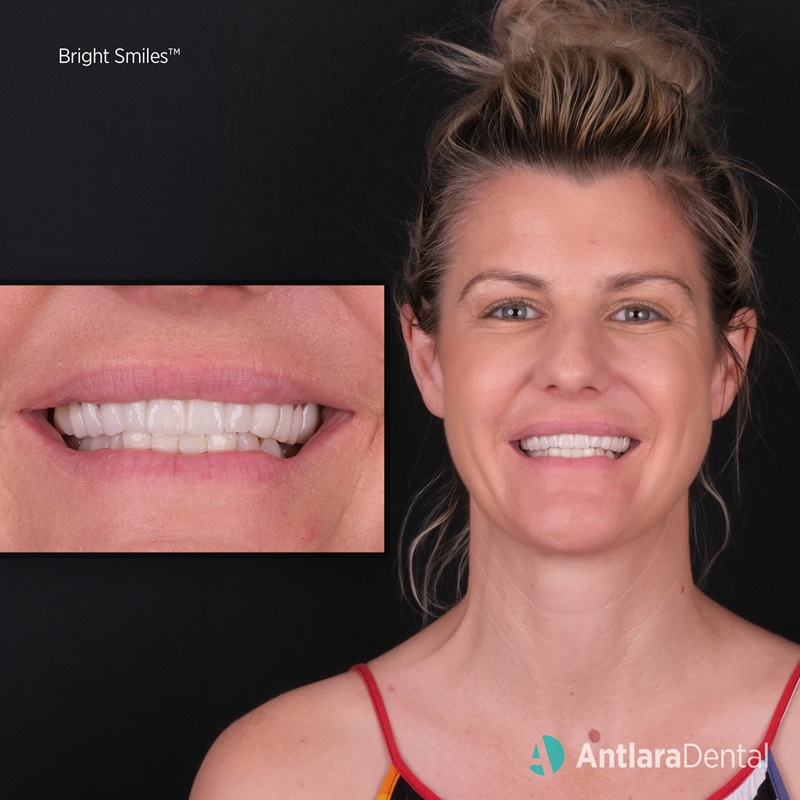
In addition, just deciding on the right tooth shade is not the only issue to be solved. Reason being, various materials bring out different tones in each shade. Comparatively speaking, zirconia veneers have a lower light transmission rate and are thicker than e-max or porcelain veneers. To that end, zirconia crowns might not take advantage of the same shade of colour as e-max crowns.
The most reliable resource for determining the ideal tooth shade
VITA developed the first tooth color guides, which have been in use since the 1950s. The sheer variety of materials available today, each with its own unique light transmittance and opacity, necessitates a more extensive selection of shades than was previously available in the relatively small number of dental veneers manufactured. Now, let us take a closer look at these tooth shade chart.
VITA classical tooth shade guide
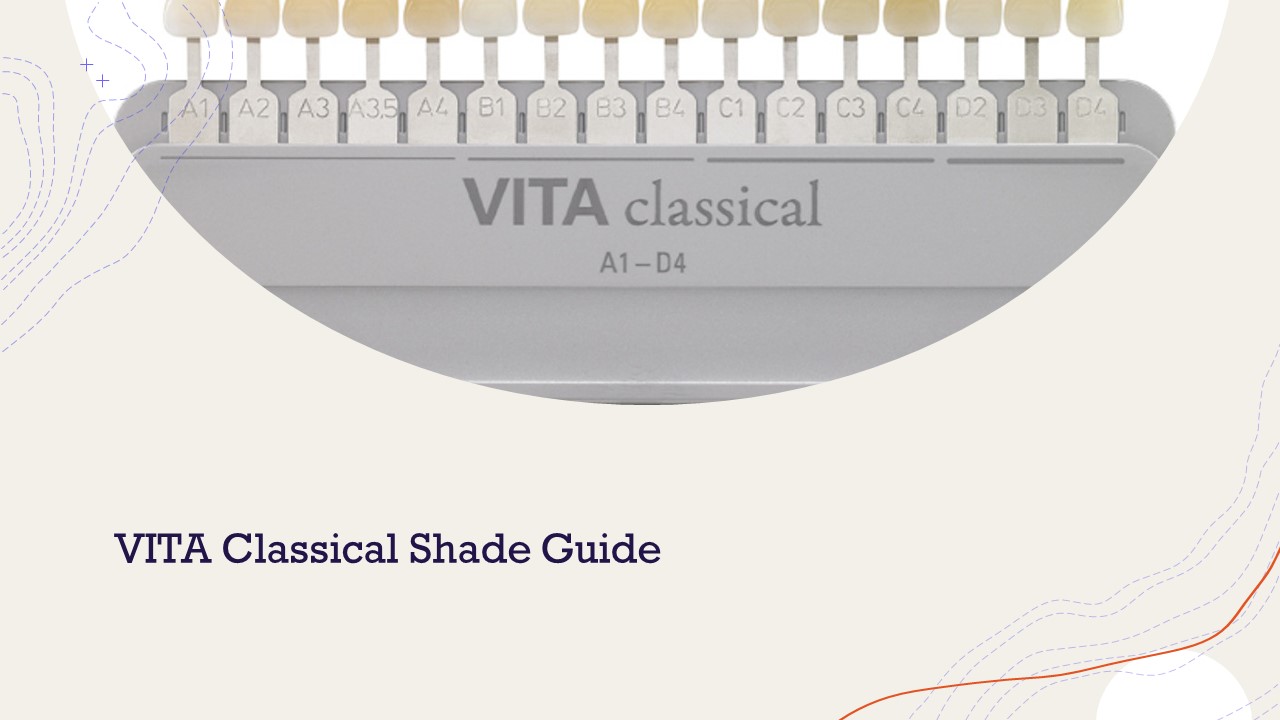
The VITA Classical Shade Guide, first published in 1954, includes sixteen different tooth shades ranging from A1 to D4. Because it is still useful today, its popularity has not faded. The guide's sixteen tooth shades are derived from a one-step procedure for determining tooth shades.
Ivoclar vivadent chromascop tooth shade guide:
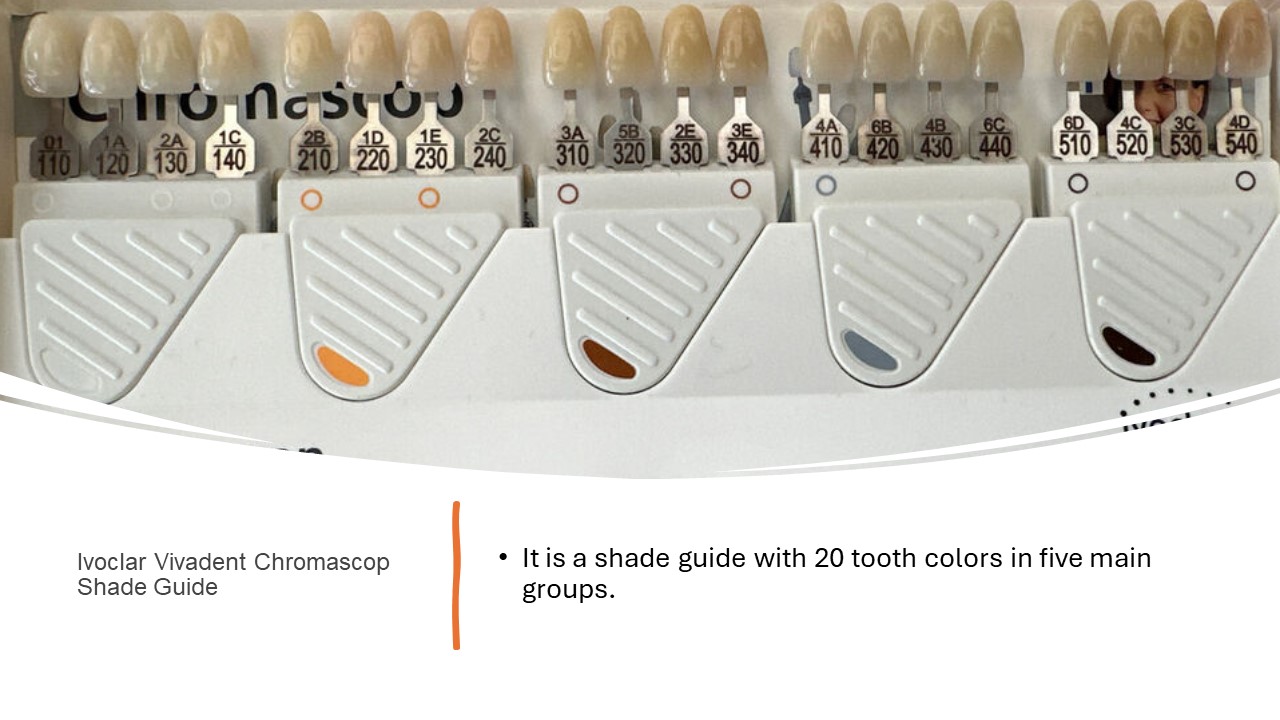
The Ivoclar Vivadent Chromascop Shade Guide is another popular tooth colour guide. Much more accurate outcomes for e-max crowns can be achieved with the help of this guide from Ivocular Vivadent, the company that makes e-max veneers.
This guide uses a two-step procedure to ascertain the shade of a patient's teeth. After settling on a tooth colour, the next step is to use the Chromascop Shade Guide to choose a colour shade. The colours available for each shade in this guide are listed below; there are four variations for each.
Group 1: White shades
Group 2: Yellow shades
Group 3: Yellow-brown shades
Group 4: Brown shades
Group 5: Gray shades
Vita bleaching tooth guide
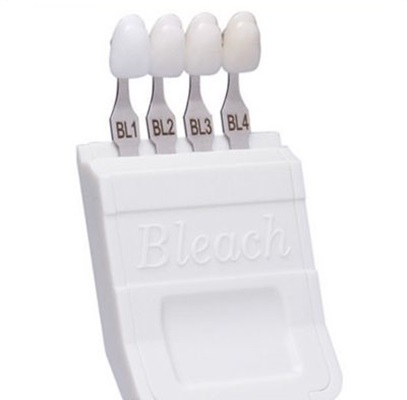
Vita Bleaching Guide is a shade guide of teeth whitening treatments; however, these shades are also frequently employed to ascertain the colour of veneers or crowns. The most popular shade among these tooth colours is BL2. While this guide sees heavy use due to the popularity of BL2, it may not be the best option for individuals seeking a wider range of colours. The colour tones in this guide are as follows.
BL1: The whitest and brightest shade.
BL2: Slightly less bright, one of the natural white shades (It is whiter than 1M1).
BL3: Slightly darker, but still quite white.
BL4: The darkest of the white shades.
VITA 3D-Master tooth shade guide
VITA 3D-Master Shade Guide, produced by VITA in 1998, has a total of 26 colour options. The most distinguishing characteristic of the VITA 3D-Master Shade Guide, in comparison to other guides, is its utilisation of a three-stage process to determine tooth colour. So it can yield the best results. Here is a brief overview of these three steps:
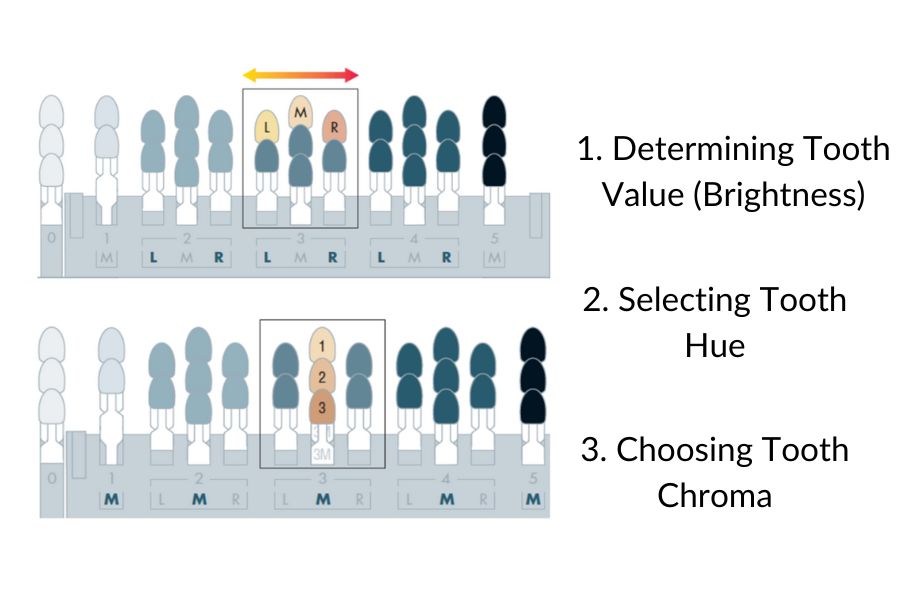
- 1. In the first stage, the brightness of the tooth is chosen. The desired brightness value is determined by comparing the patient's existing teeth and their desired brightness with the brightness values in the guide. The lightest colour is 0, and there are 1, 2, 3, and 4 brightness values.
- 2. Once the desired brightness value is established, the colour shade is determined. One of the three colour tones in the guide—L (Light), M (Medium), and R (Reddish)—is chosen.
- 3. Once the colour tone is established, the selection of chroma is made. The selection of chroma is determined based on the brightness and colour value. Each option in the guide corresponds to a specific artificial tooth.
Within the VITA 3D-Master Shade Guide, once a tooth shade has been established, there are 6 alternative options available that closely match the tooth in terms of brightness values, colour values, and chroma values. For example, you can get a one-level brightness boost for tooth colours by keeping the chroma value constant. Alternatively, you can achieve a slightly lighter or reddish shade of tooth colour by maintaining the desired shade's brightness and chroma value. One major perk of the VITA 3D-Master Shade Guide is its ability to accurately predict tooth shades; no other guide offers this level of detail.
Antlara ti̇meless white “1M1”
The tooth colour of 1M1 exhibits an ideal equilibrium between naturalness and whiteness. For those who cannot give up whiteness in their teeth and want them to look natural, this shade often hit the bullseye. Patients frequently described the 1M1 tooth color—which is nearly indistinguishable from their natural teeth—with tears. Here we will try to explain the reasoning behind the tooth colour selection along with some patient photos.
Why should i choose 1M1 tooth colour:
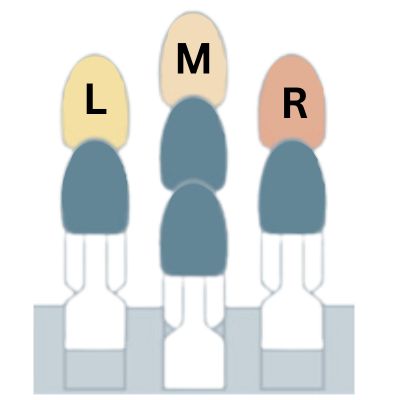
1m1 tooth colour is a shade from the VITA 3D-Master Shade Guide. This guide provides 6 distinct options that closely match the desired tooth colour in terms of brightness, shade, and chroma value.
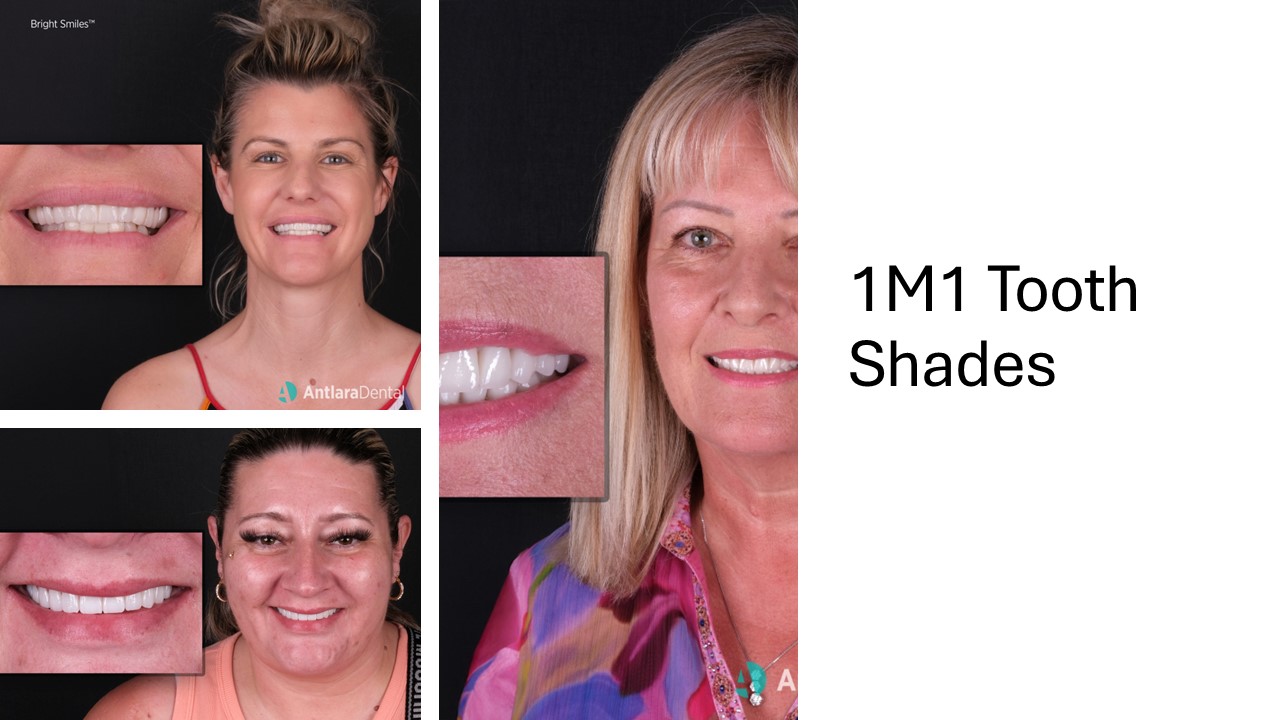
While they appear very bright on black skin tones, 1m1 tooth shade blend in perfectly with light-colored skin tones, offering the perfect balance between whiteness and naturalness.
One of the most popular tooth shades is 1m1, and other widely used tooth colours are fairly similar to 1m1. Here are some more tooth colour shades that are similar to 1M1:
Other tooth colours close to 1m1:
B1: (VITA classical tooth shade guide)
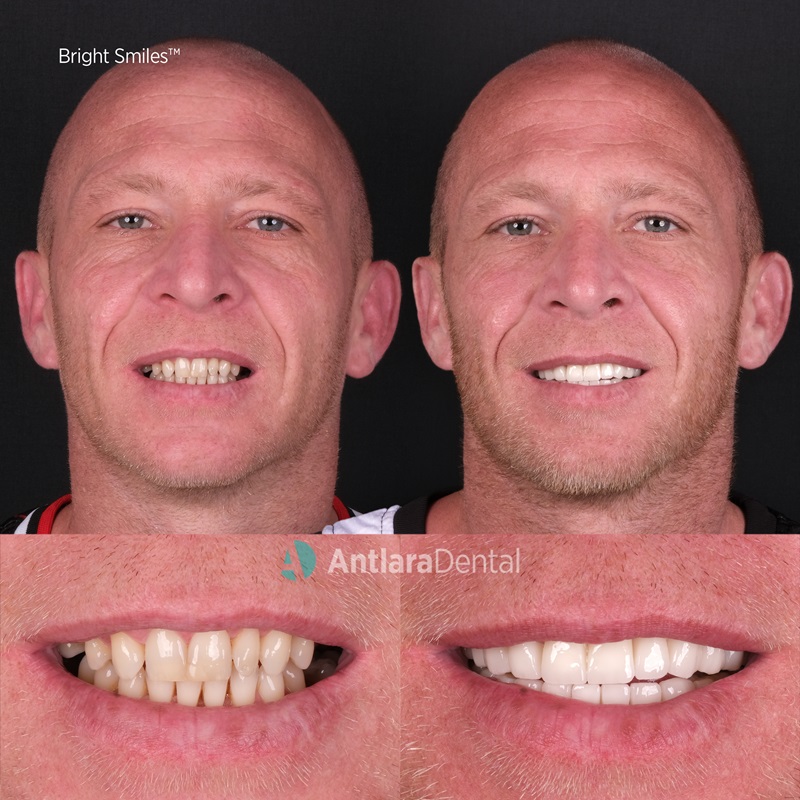
This colour is characterised by its naturalness and whiteness, and it is significantly analogous to 1M1.
A1: (VITA classical tooth shade guide)
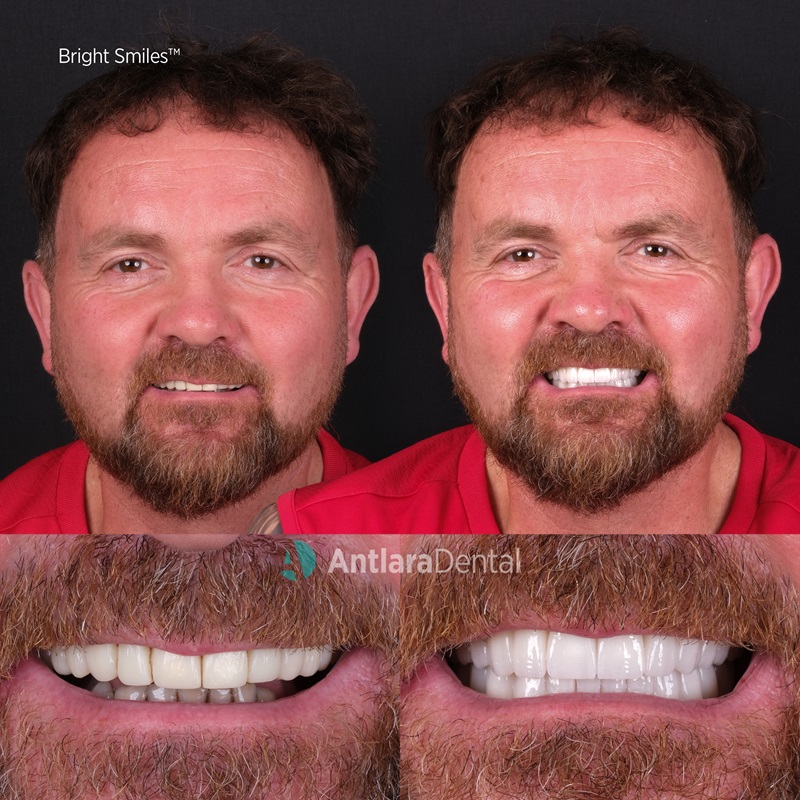
This shade is a slightly more yellowish white, resembling a natural white shade similar to 1M1. The whiteness of the teeth is slightly compromised in this shade, which emphasises naturalness more. But unlike the Vita Master shade guide, which offers a much wider selection of shades, this shade was chosen from the Vita Clasic guide.
BL2: (VITA bleached guide 3D-MASTER)
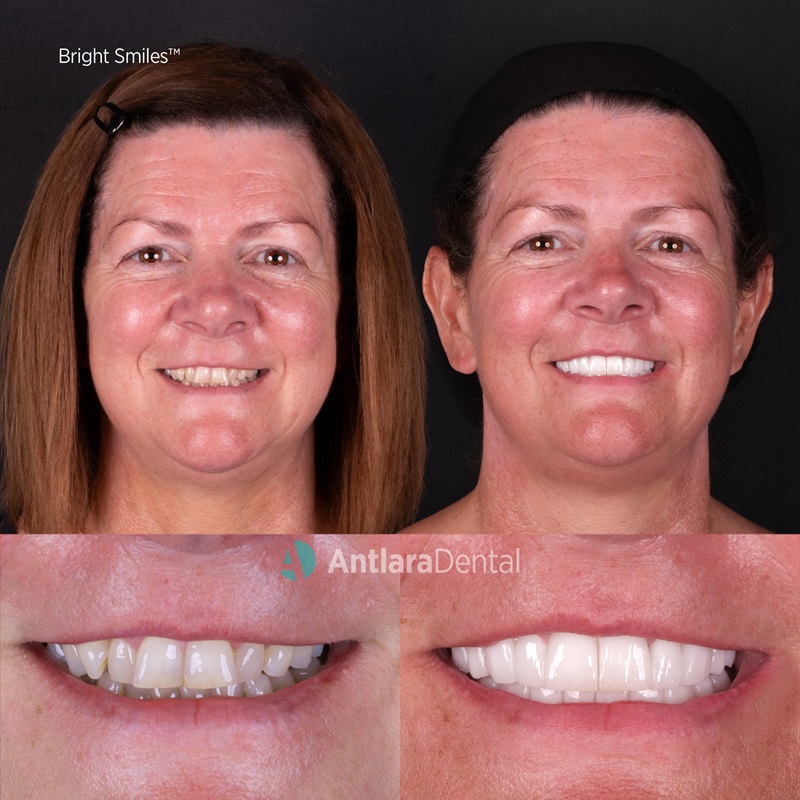
This shade provides a marginally brighter appearance compared to 1m1. It is crucial to practise in natural light to see if this shade works with the patient's features before actually using it, no matter how great it is.
Behind-the-scenes factors for tooth colour choice
The primary factors that determine the shade of your teeth are your skin tone and pigmentation. To make a final call, though, a more thorough assessment is required. A patient's eye and lip colours also play a role in determining their ideal tooth colour. Along with these factors, skin undertone is a major influence on tooth colour.
Skin undertone is ascertained by the degree of warm (gold, peach, yellow, orange, and olive green) and cool (silver, blue, purple, pink, emerald green) pigments that are responsible for determining the skin's colour. A skin undertone may be entirely distinct from the colour of our skin. A person of African descent may have a cooler skin tone than someone with lighter skin, and vice versa.
Because of these determinants, a specific colour tone may appear more natural to certain individuals than to others. In other words, each individual possesses a unique shade of white, and when we determine it, we provide them with the most natural tooth colour possible.
On the other hand, with age, the upper lip may droop downward towards the lower teeth, obscuring the front teeth and making the lower teeth more noticeable. This could result in the front teeth's restorations being just barely noticeable. Thus, it is imperative that the upper and lower teeth be treated in tandem when scheduling an aesthetic procedure at a later age.
The process of determining tooth shade
Determining the perfect tooth shade for a patient is only possible in the ideal setting and with productive patient-dentist communication. Below, you can examine the specifics of this procedure in greater depth.
Correct lighting conditions:
The best kind of lighting is natural daylight, yet dental lights ought to be utilised as well. Because of its potential impact on colour detection, fluorescent lights should be avoided.
Cleaning of teeth:
Teeth should be cleaned prior to the determination of colour. The accurate determination of tooth colour may be impeded by plaque, food debris, or other surface stains.
Quick comparison:
Shade selection ought to be done quickly. The comparison time for each sample should be kept short (e.g. 5-7 seconds).
Avoiding eye fatigue:
While choosing colours, it is important to give the eyes a chance to relax by taking regular breaks.
Communication between dentist and patient:
Effective communication between the dentist and the patient is essential to accurately determine the patient's tooth colour. It is important to have a clear discussion about the patient's expectations and the desired natural appearance of the tooth colour.
Determining the shade of a patient's teeth is an important part of cosmetic dentistry. When deciding, it is crucial to consider the dentist's aesthetic expertise, their communication skills, and their level of experience. Dentists at Antlara Dental have been practicing for 20-30 years, so they are well-qualified to advise you on this matter. Since its establishment in 2005, our clinic has been providing medical services to European patients in Antalya. Reach out to us and take advantage of the expertise of our dental practitioners.